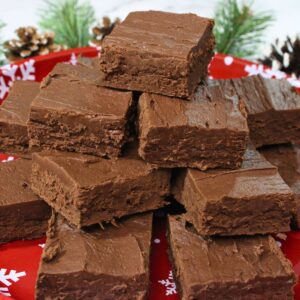
2 Ingredient Microwave Fudge (Without Condensed Milk)
This 2 ingredient fudge uses frosting and baking chips to make a soft, sweet treat. The preparation time is very low, making it a low fuss dessert option!
Equipment
- Microwave
- Spoon or spatula
- Baking dish (or similar) I use an 8x8 pan
Ingredients
- 16 Ounce jar ready to spread frosting (such as Pillsbury)
- 10-12 Ounce bag baking chips (such as semisweet chocolate chips)
Instructions
- Measure out your chips and frosting so you have equal amounts. I usually use the whole bag of chips and adjust the frosting based on the size of the baking chip bag (but you could use extra chips to match the frosting container if preferred)16 Ounce jar ready to spread frosting, 10-12 Ounce bag baking chips
- In a microwave safe bowl, melt the chocolate chips on high in 30 second increments, stirring after each, until they are smooth (generally about 1 ½ minutes in a 1000W microwave)
- Place the frosting into a second microwave safe bowl and cook on high for 30 seconds. It should be somewhat liquified and pourable at this point, but you can add additional time in small increments as needed
- Combine the melted chips and the liquified frosting together and stir well to evenly combine them
- Pour into a greased pan (I use an 8x8 baking dish lined with wax paper) and spread evenly. If you want to add some sprinkles or other decorations, do so now as well!
- Refrigerate until set, generally about 1-2 hours (or freeze for 30 minutes if you’re in a rush)
- Slice and serve!
Notes
- Any flavor of frosting is fine (I’m using classic vanilla), but make sure you don’t use whipped frosting, as it’s a different consistency. You’ll need an equal amount to the amount of chips you put in, so you may have some left over based on the size of normal jars
- Baking chips will also vary in bag size depending on flavor. I’m using a 12-ounce bag of semisweet chocolate chips, but note that yours could vary by brand and flavor! Don’t use candy chips (such as toffee), as they don’t melt well
- Substitutions. This recipe also works with creamy peanut butter in place of the baking chips, still used in equal amounts with the frosting. To replace the frosting, you can use a can of sweetened condensed milk instead. Feel free to adjust for what you have on hand!
- If your frosting comes in a container with a ‘5’ in the recycling symbol on the bottom, it is technically microwave safe. To reduce bowls, you can remove the lid and foil top, and then just microwave the frosting in the jar. I still prefer to transfer it for easier stirring, but know that you have the option!
- You want the mixture to still be pretty soft and liquidy when you pour it into the container to set. If it’s beginning to seize, you can always microwave for 20-30 seconds again to re-warm it before pouring!
- Since this recipe is softer than traditional fudge, it really needs to be stored in the refrigerator to maintain a fudge-like consistency. Store covered for up to 2 weeks. Remove and plate just before serving!
- I cut my 8x8 pan into 4 rows each way to create 16 blocks of fudge. It’s very rich and decadent so I feel the pieces can be pretty small, but you can of course cut the pieces as large as you like!
- Exact nutritional values will vary based on brand and flavor of ingredients, any toppings or mix-ins added, size of pieces, and quantity consumed, so please consider this a guideline only
Nutrition
Serving: 57gCalories: 257kcalCarbohydrates: 38gProtein: 1.2gFat: 13gSaturated Fat: 5.9gSodium: 56mgPotassium: 113mgFiber: 1.7gSugar: 34gCalcium: 9.9mgIron: 0.9mg
Tried this recipe?Mention @TheDinnersDoneQuick or tag #dinnersdonequick!