My first air fryer was a GoWise brand, and you could say it’s the one that started it all around here. One of the things I wish I had a better handle on in the beginning, though, was how to use a GoWise USA air fryer.
If you want to skip the manual reading (or don’t have one) I’m going to help you out with how to use the GoWise air fryers.
Nowadays they have a number of models, but the controls aren’t difficult to master among them. GoWise even makes a cute retro model, which you can see over in our best retro air fryers if that’s your style!
GoWise USA 5.8 QT Air Fryer

How Do You Turn On a GoWise USA Air Fryer?
- Plug the power cord of your GoWise USA air fryer into a wall outlet
- Make sure the basket is fully inserted
- Some units will turn on automatically at this point. If yours does not;
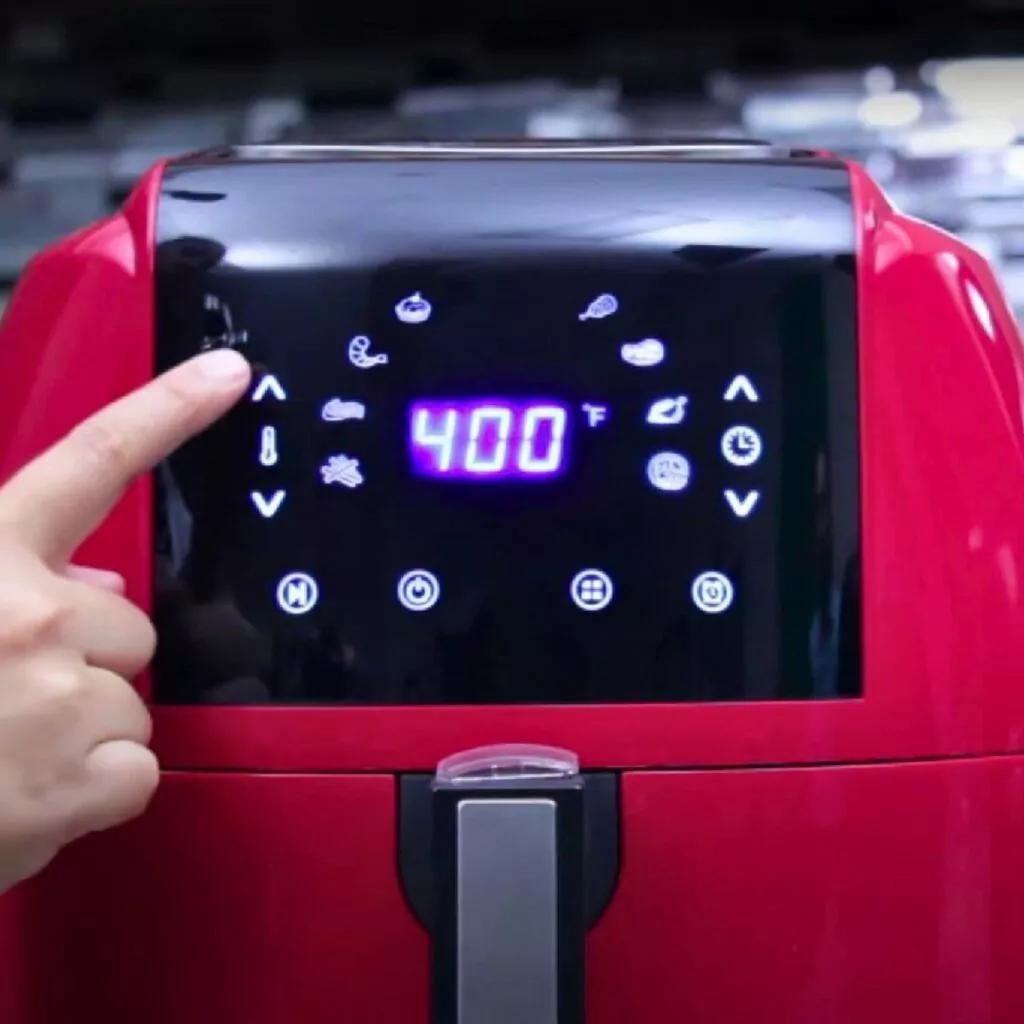
- Press the power/start button, which looks like a circle with a vertical line at the topmost part of the circle
Your GoWise USA air fryer should now be turned on, which is an important first step towards using it.
Sometimes the power button is a physical button on the unit, and other times it is a digital button that must be depressed on the screen.
For analog models of GoWise air fryer (which are less common), power to the unit is indicated by a green light on the front of the air fryer. This should turn on automatically once the unit is plugged in.
How to Operate a GoWise USA Air Fryer
- Plug the power cord and insert the basket
- Use the up/down arrows on the touch screen of digital models to select a temperature and a time. Each has their own (temperature has a thermometer picture, while time has a clock). Analog models may just rotate each dial accordingly
- Then, press the power button on a digital GoWise air fryer to start the cooking cycle, or simply release the time adjustment on an analog model
- If your unit has a smart program button (4 squares in a circle symbol) or a menu button (4 horizontal lines), short press it to rotate throughout the different options. Once on the desired selection, press start to begin the selected program
- To set the kitchen timer, press the alarm clock icon. Press again to toggle between available settings (usually 5, 10, or 15 minutes)
If you need to make changes mid-cook cycle, just use the pause button (two vertical lines side by side) to pause cooking. Then, make adjustments to time or temp as needed and press the pause button again to resume.
The larger air fryer toaster oven models also feature a light button, which toggles the internal light on and off so you can watch your food while cooking. Just press it once to turn on, and again to turn off.
Should your unit have a rotisserie option, the rotisserie button may be pushed to start that cooking mode. This is separate from the rest of the air frying functions and is only designed for use when cooking a rotisserie.
If that piques your interest, check out some of our best air fryers with rotisserie to see if one is in your future!
How to Turn Off GoWise USA Air Fryer
- Long press & hold the start/power button
- Unplug the air fryer power cord from the wall outlet
No matter which model you have, unplugging it and therefore removing its source of power works to turn off a GoWise USA air fryer. With analog models, that’s all you need to do.
If you prefer to leave your unit plugged in but just turned off, then you’ll want to press the power/start button until it turns off or enters standby mode.
It should also be noted that most models have an auto shutoff feature that will turn the unit off about 30 seconds after a cooking cycle is completed.
Additionally, most GoWise USA air fryer models turn off for safety when the basket is removed.
How to Preheat a GoWise USA Air Fryer
- Set the temperature to the desired level, using the turn knob or up and down arrows (depending on your model)
- Then, set the timer for 5 minutes. This may be longer than is necessary depending on the desired temperature and size of your air fryer, but it’s a safe bet as a generalization. It won’t hurt the air fryer in any way if it’s a minute or two longer than what’s really needed.
- Use the power/start button to start the cook cycle on digital units. For analog units, the cook cycle begins automatically when you release the timer knob
- Once the cook cycle completes, your GoWise USA air fryer is preheated
While preheating adds extra time to set up, it’s worth it. This process ensures your food spends time actually cooking instead of just getting the air fryer up to temp. That makes for crispier and more evenly cooked food.
I always recommend setting it to run while you finish getting your food ready. Whether that’s cutting, seasoning, or just removing from packaging, by the time you’re ready to go the air fryer will almost be preheated.
This is a pretty standard process for most air fryers. However, if you have a different brand, I can also help you preheat a Pampered Chef air fryer or learn how to preheat a Ninja air fryer as well.
Can You Put Foil in a GoWise USA Air Fryer?
Yes, you can safely put foil in a GoWise USA air fryer.
However, it’s important to not block air circulation in the basket. Thus, it’s better to wrap your food in it, versus lining the entire cooking basket with it.
The same concept applies if you have a GoWise air fryer oven. Don’t wrap the entire rack insert in foil as that will restrict air flow. However, cooking a baked potato in the air fryer with foil works great!
Other Air Fryer How-To Guides
- How to Use a Bella Air Fryer
- Simple Guide to Using a Chefman Air Fryer
- How to Use a Black and Decker Air Fryer
Final Thoughts
Now that you know how to use a GoWise USA air fryer, you’ll be cooking in no time!
Speaking of cooking, check out my list of the best GoWISE air fryer recipes to try today.
Whether you have an analog, digital, or toaster oven model, most of the controls are pretty similar. While the buttons sometimes appear in different places, now that you know what you’re looking for, you can locate them pretty easily.

I enjoy trying new recipes, creating my own, and dabbling with new techniques all the time. My husband loves to protest when I make him my guinea pig, but it’s all for the love of food!
My cooking philosophy is that great tasting food doesn't have to be complicated or time consuming to make. I'm a home cook with over 20 years of experience feeding myself and others. I've learned from a variety of different people, things I've learned online, and some trial and error as well.
I enjoy cooking a variety of foods, from convenience to comfort foods, as well as international cuisine. You can rest assured that all of my recipes have been actually made, thoroughly tested, and most importantly: tasted! I want you to enjoy my food as much as I do!
- Air Fryer Patatas Bravas: Crispy Spanish Side or App! - April 13, 2024
- Crispy Trader Joe’s Chicken Taquitos in the Air Fryer - April 10, 2024
- Orange Strawberry Tequila Fizz: Bubbly Fruity Cocktail! - April 8, 2024