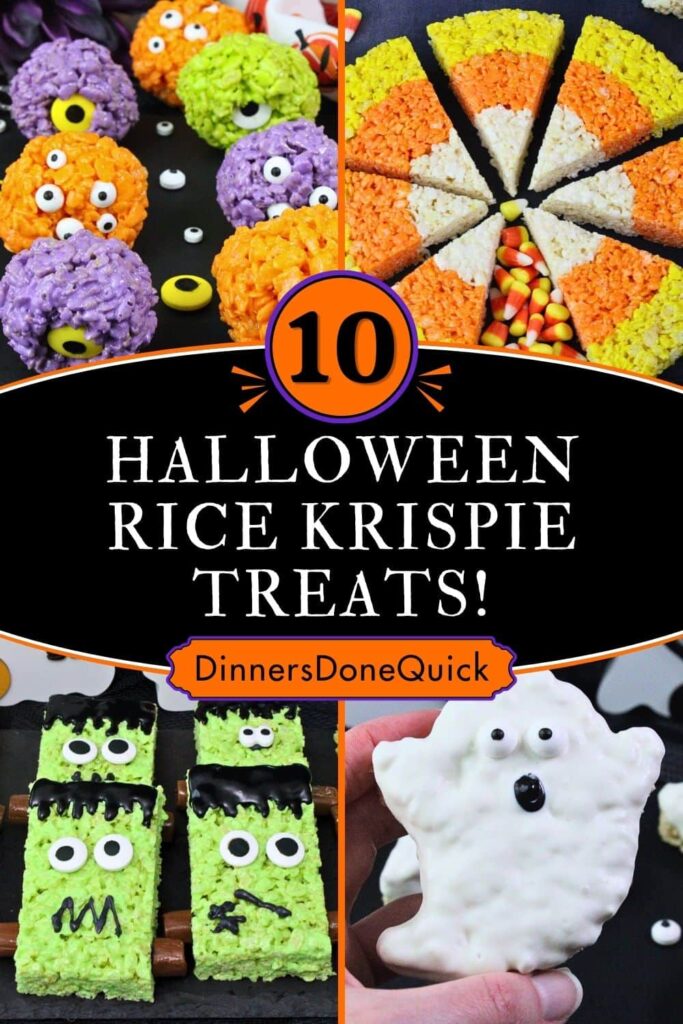
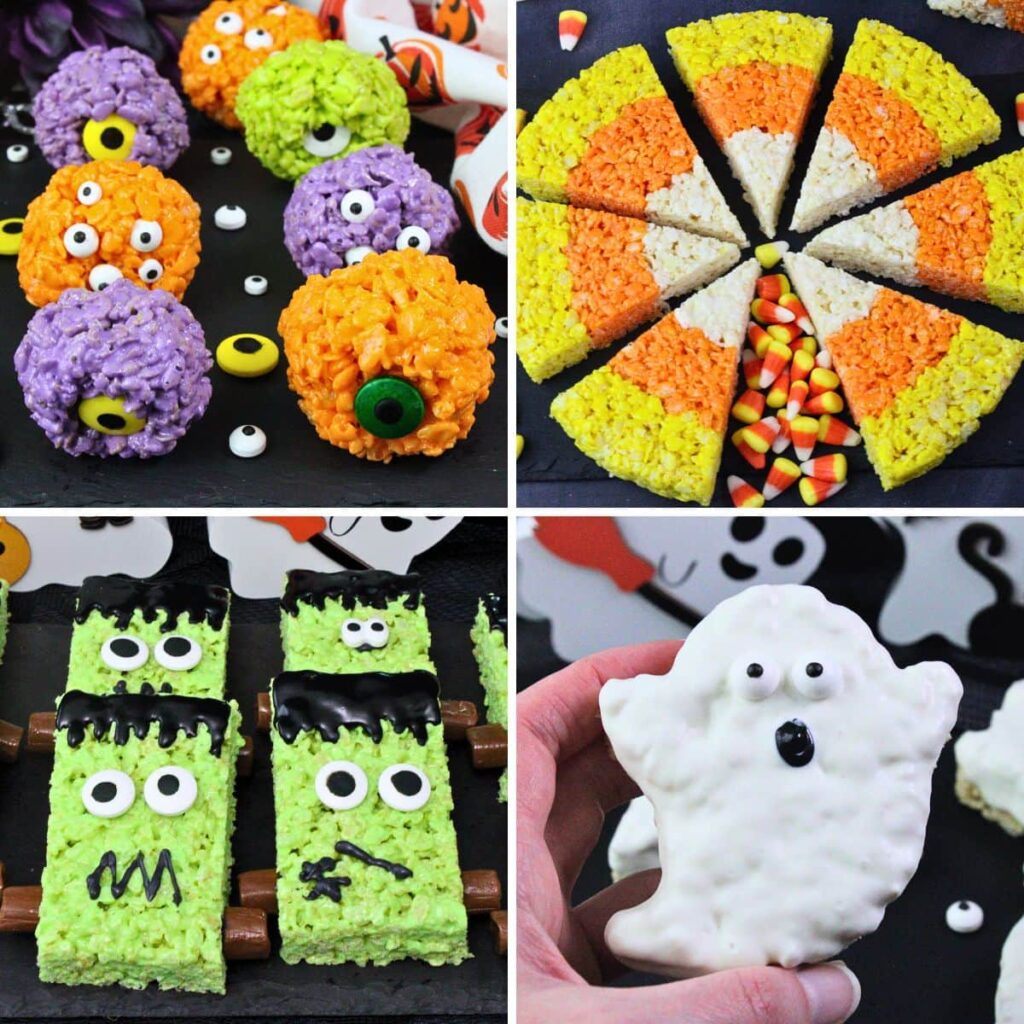
When it comes to preparing for a Halloween party, I love to make no bake treats to take the load off the planning. These Halloween Rice Krispie treats are such great ideas! They’re spooky cute, perfectly themed, and easy to make ahead so you can be a spooktacular host!
Quick + Easy Recipes
straight to your inbox
Why Make Halloween Rice Krispie Treats
- Easy To Make: Rice Krispie treats are simple to prepare, making them a great choice when you want a festive Halloween dessert without a complicated recipe!
- Perfect For Halloween: Turn the classic cereal treat into ghosts, monsters, pumpkins, mummies, and other spooky shapes, with simple instructions for an instant Halloween upgrade
- No Oven Required: Most versions come together on the stovetop or in the microwave (which is really just to melt butter and marshmallows), so you can make them without heating up the kitchen
- Kid-Friendly: Kids can help shape, decorate, and add sprinkles or candy to create their own spooky treats!
- Great For Parties: They’re easy to portion and serve, making them perfect for Halloween parties, school events, bake sales, and fall gatherings
- Easy To Customize: Change the shapes, colors, candies, sprinkles, and decorations to create treats for any Halloween theme or movie night
- Budget-Friendly: A handful of simple ingredients can make a generous batch, which is especially helpful when you’re feeding a crowd
- Make-Ahead Friendly: Prepare them ahead of time and have a festive dessert ready to go when your Halloween party begins!
- Fun Alternative To Cookies And Cupcakes: If you’re looking for something a little different, decorated Rice Krispie treats are a fun twist on traditional Halloween desserts
- Great For Gifting: Wrap individual treats in clear bags or cellophane for an easy homemade Halloween gift, party favor, or trick-or-treat surprise
Essential Ingredients and Tools
What You’ll Need
- Crispy Rice Cereal: The classic base for Rice Krispie treats. Any similar puffed rice cereal can work, depending on the recipe
- Marshmallows: Mini marshmallows melt quickly and evenly, making them a popular choice for the sticky binder
- Butter: Adds richness and helps create a smooth marshmallow mixture. I recommend salted butter, but unsalted works if you add your own pinch
- Chocolate or Candy Melts: Useful for dipping, coating, drizzling, or creating colorful Halloween decorations!
- Food Coloring: Gel food coloring is especially useful for creating spooky green, orange, purple, or other vibrant shades
- Sprinkles & Colored Sugar: An easy way to add Halloween colors and festive texture
- Candy & Edible Decorations: Candy eyes, chocolate chips, licorice, candy pieces, and other small treats can transform basic Rice Krispie treats into ghosts, monsters, mummies, and more
- Icing or Decorating Gel: Great for drawing faces, adding details, or attaching small decorations. Black cookie icing is always in my arsenal!
- Pretzels & Other Candy Pieces: Useful for creating horns, arms, legs, or other fun Halloween features!
Must Have Tools
- Large Saucepan or Microwave-Safe Bowl: You’ll need one for melting the butter and marshmallows, depending on the recipe
- Large Mixing Bowl: Helpful when combining the melted marshmallow mixture with cereal, especially for larger batches
- Spatula or Wooden Spoon: Use a sturdy utensil to stir the cereal into the melted marshmallows
- Baking Pan: A standard square or rectangular 13×9 dish works well for pressed Rice Krispie treats
- Parchment Paper: Helps prevent sticking and makes treats easier to remove from the pan, or it can be helpful to press the mixture flat
- Cookie Cutters: Halloween-shaped cutters make it easy to create ghosts, pumpkins, bats, cats, and other festive shapes
- Halloween Molds: An alternative to cookie cutters, silicone molds can create detailed shapes without needing to cut them by hand
- Piping Bags or Decorating Bottles: Useful for adding melted chocolate, icing, or decorative details!
- Small Bowls: Handy for organizing sprinkles, candy eyes, and other decorations while you’re assembling the treats
- Non-stick Spray: I use nonstick spray on everything to combat the sticky marshmallows. Put it on your spatula to press, spray your hands to form balls, and grease your knife or cookie cutter for creating shapes
Now that you’re ready to make these fun no bake treats, let’s dive into some spooky recipes to get you started!

Frankenstein Rice Krispie treats (or perhaps I should more accurately say ‘Frankenstein’s monster’) are perfect for spooky season! The base rectangular treats are tinted with a neon green food coloring to make them monster-inspired and sure to stand out.
Then, it’s just adding in all the fun details, like candy eyes, black frosting or icing hair, and some “bolts” for the neck. I use Tootsie Rolls, but pretzels or even dipped mini marshmallows make great alternatives. You can customize each one with its own face for a fun twist!
Pair them with other themed treats like my Frankenstein Strawberries or non-alcoholic Frankenstein Floats to round out the dessert spread!

These adorable pumpkin Rice Krispie treats look adorable on your dessert table, and they actually work for Halloween, Thanksgiving, and fall in general!
Don’t worry, they’re not actually pumpkin flavored (so your picky eaters will still enjoy them)! Just tint your standard treat orange, roll it into a ball, and finish with an edible stem. I like Rolos, but pretzels, Tootsie Rolls, or similar options work.
The leaves can be added with green icing, or a green mini M&M! You could also use frosting or icing to add faces if you wanted them to look like jack-o-lanterns instead of just pumpkins.
They look great alongside my Pumpkin Chocolate Covered Cherries and savory Pizza Pumpkins for a full pumpkin-themed spread!
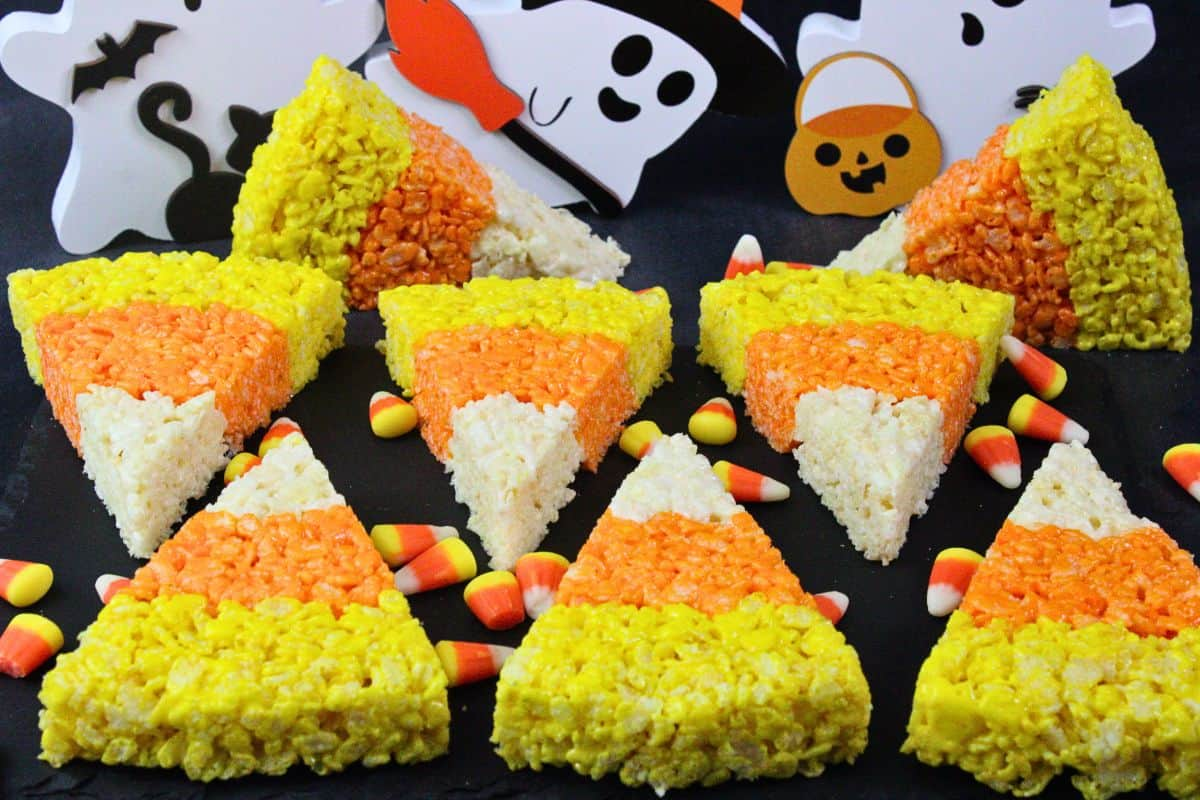
For a festive treat that looks just like the candy itself, you’ll love these candy corn Rice Krispie treats! Don’t worry, if you’re team ‘I hate candy corn,’ they’re not actually flavored like the sweet. Just coloring and a fun arrangement that even the skeptics will love!
You will need a round pan (like a cake pan) to get that iconic shape, though you could freehand it on a baking sheet if you’re craftier than I am. Then it’s just simply adding tint, shaping, cooling, and cutting into wedges just like candy corn!
Serve it up alongside some Candy Corn Bark or Candy Corn Fudge to keep with the theme. All of them are no bake and easy to make ahead, to make your Halloween party even easier (and of course, delicious too)!
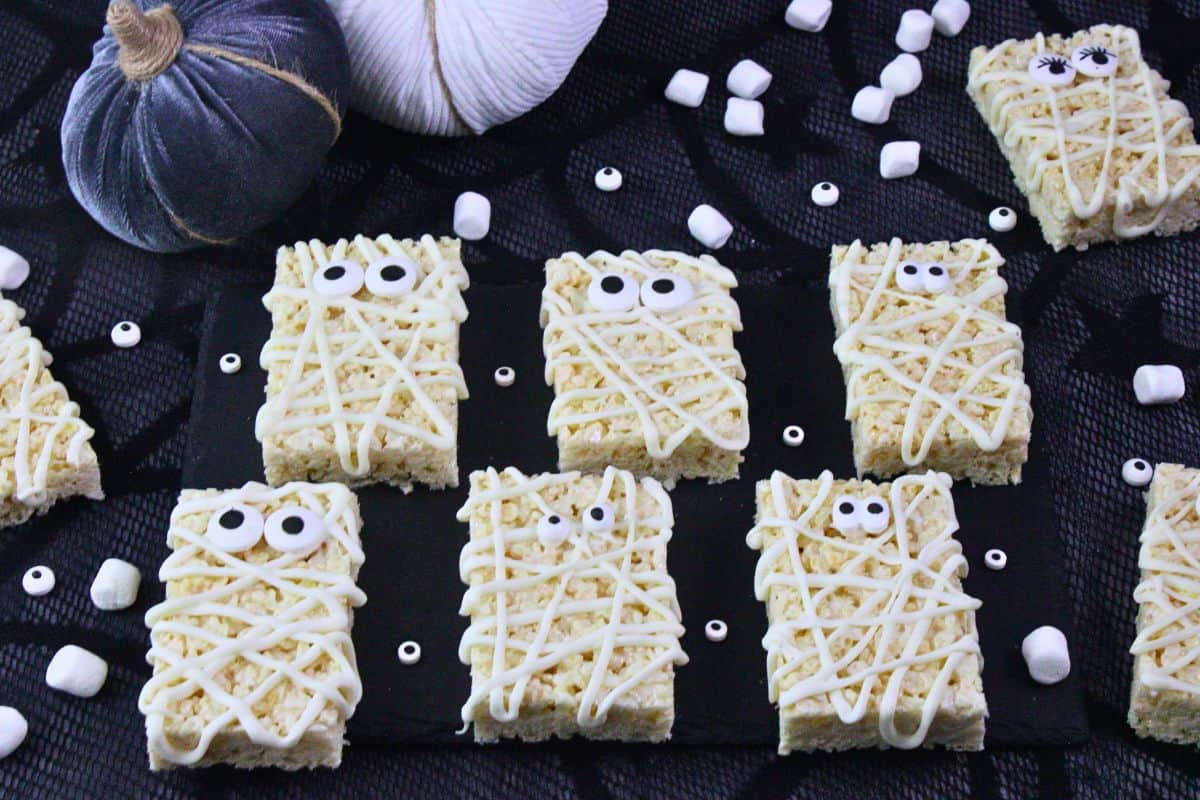
Take a plain Rice Krispie treat, drizzle it with some melted white chocolate “bandages,” add some edible googly eyes, and you’ve got mummy Rice Krispie treats! This one is so easy to make because it doesn’t require any extra steps to color or shape them!
Of course, you could customize them with candy melts to make different color wraps, or add some other fun seasonal details if you want. If you don’t have candy piping bags, you can just use a Ziploc and nip the corner off instead to pipe on the melted chocolate!
These treats fit perfectly with Halloween, as well as monster themed parties or movie nights – especially if they’re mummy themed! You can pair them with my Mummy Meatloaf for dinner, or Mummy Jalapeno Poppers for an appetizer!
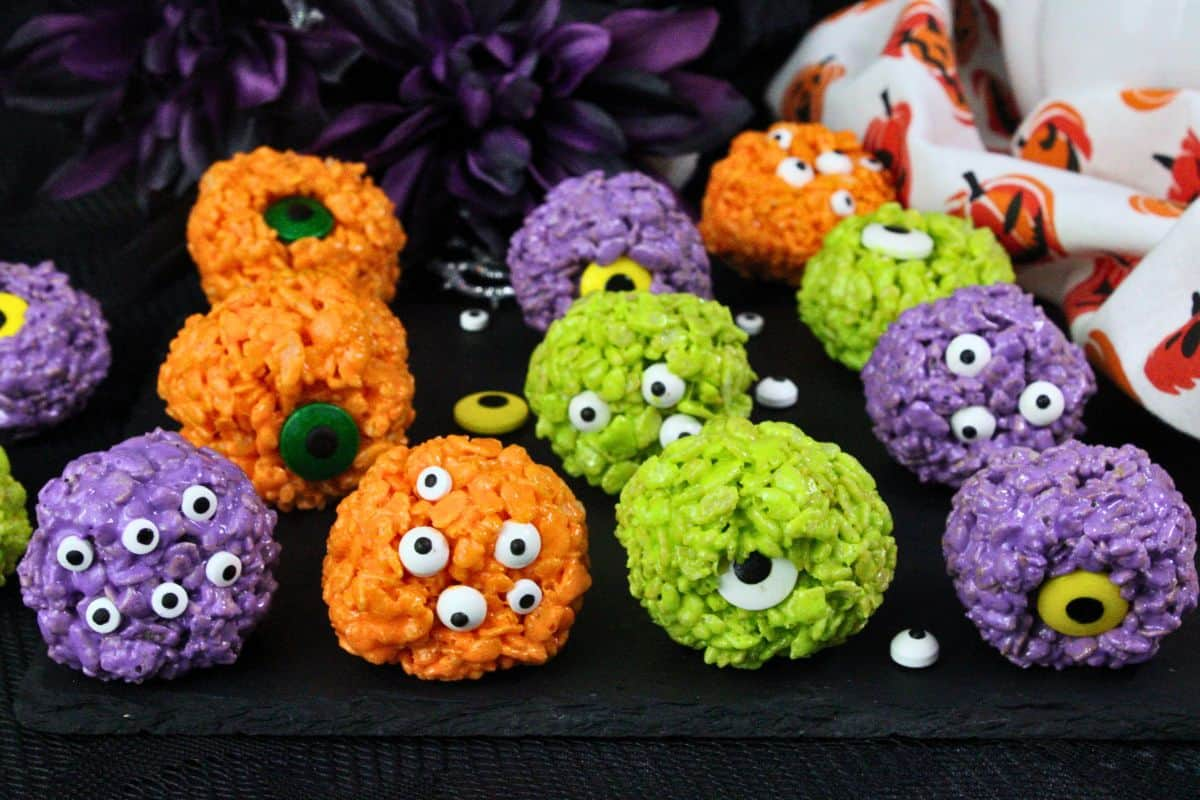
I love these fun monster Rice Krispie treats for Halloween! The Rice Krispie cereal mixture is rolled into balls and stuffed with a candy eye. They’re super colorful, spooky cute, and easy for small hands to hold. Plus, the kids can help with decorating too, by adding the decorations!
You can customize them in all sorts of fun ways, by using different colors and sizes of candy eyeballs, adding different colorings to your treat base, and even shaping them differently. If you don’t like the eyeball style, try cutting rectangles and dipping them in colored chocolate instead!
Compared to a typical treat, I use a little extra marshmallow mixture here to make them more vibrant in color, easier to roll and keep their shape, and also a bit easier to eat, given the rounded ball design!
Serve monster Rice Krispies alongside some Monster Pretzels or Monster Fudge to complete your sweet spread on the Halloween dessert table!

These layered Halloween Rice Krispies give me serious Hocus Pocus Sanderson sisters vibes! With fun stacks of orange, purple, and green, they’re perfect for your Halloween party, or any witch-themed event or movie night!
Adding in some crushed Oreos and candy eyeballs in with the crispy rice cereal gives a nice flavor and textural contrast, along with giving you a witch’s brew feel. You can make these treats on the stovetop in a large pot, or even use the microwave for a quicker shortcut.
They look great alongside other Halloween themed Rice Krispie treats, but you could also lean into witch-themed snacks, or anything else purple, green, and orange to complete your party spread!
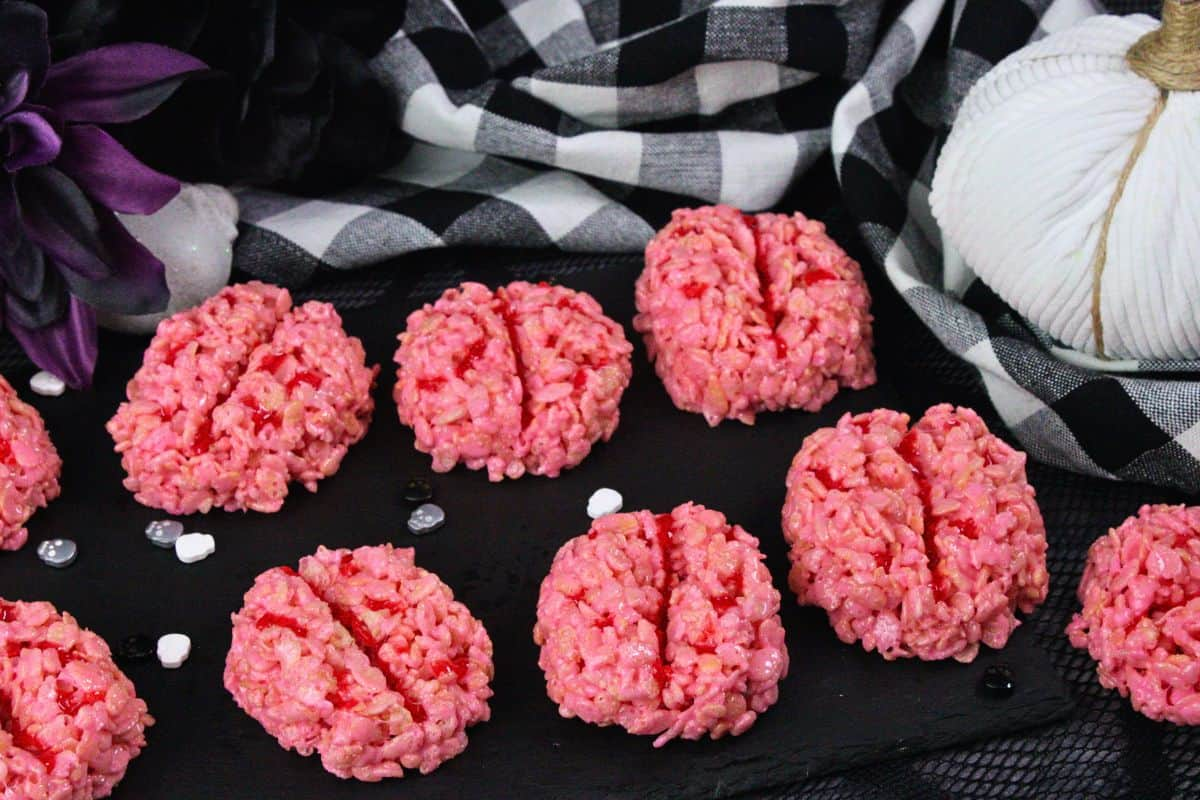
Whip up some mad scientist madness with these brain Rice Krispie treats! They’re made with pink tinted treats, shaped into oblong shapes, and then a butter knife is used to add the lobe pattern.
The key is to use cooking spray liberally with this recipe! Spray your hands for shaping the treats, your knife for adding the details, and the baking sheet you set them on, too!
Finish with some red gel icing to add a little “bloody” effect to make your brain treats extra spooktacular! You can use the same decorating gel to make the rim for a Vampire Mimosa as a treat for yourself after making these Halloween sweets!

A little creepy crawly, and also a whole lot adorable, these spider Rice Krispie treats are perfect for Halloween! They’re made with crisp rice cereal and colored with cocoa powder (but you could use food coloring, or swap to Cocoa Krispies instead).
Then, it’s just adding in the legs, using Pocky, pretzels, or similar, and of course dabbing on the googly eyes that make for the perfect finishing touch!
These adorable spooky cute treats are great served up on a Halloween dessert tray or charcuterie board, or you can use them as a topper on cakes or cupcakes as well, for the ultimate delicious theming!
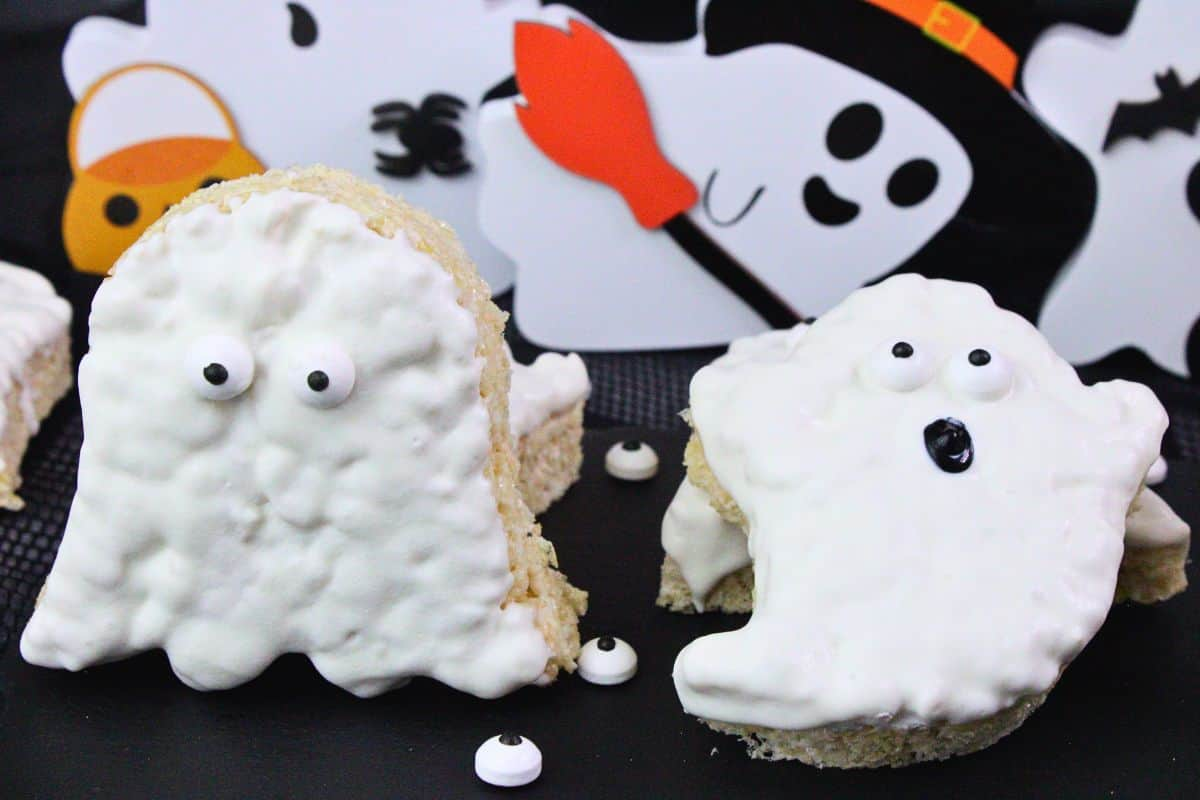
These fun ghost Rice Krispie treats use a cookie cutter to give them their spooky shape (though you could totally DIY it with a sharp knife if you’re handy – something I’m not)!
Then, they get a dip in white chocolate or candy melts to add that extra ghostly base, before getting some edible googly eyes, and an optional icing mouth if you like them that way.
They’re perfect for Halloween, super customizable with different cutter shapes and sizes, and you can even make different colors of ghosts with other candy melt hues. Serve them up with Ghost Pretzels and Strawberry Ghosts to complete your dessert tray!

Want to throw something together last minute, or just want a way to get rid of some of that Halloween candy? These Halloween Rice Krispie treats are made with your seasonal favorites like M&Ms and candy corn, but you can frankly use whatever you have on hand!
Add some colored candy melt drizzles for fun, use crushed up pretzels to add pops of saltiness and texture, or whatever bits and mix-ins you have!
They’re loved by kids and adults alike, and a great way to turn just plain candy into another sweet treat that the whole family will enjoy!
Halloween Rice Krispie Treat Recipe FAQs
What Is The Secret To The Best Rice Krispie Treats?
The secret is to avoid overheating the marshmallows and not packing the cereal mixture too tightly. Use fresh marshmallows and cereal, gently press the mixture into the pan or mold, and you’ll get soft, chewy treats with the best texture.
How Many Days Before A Party Can You Make Rice Krispie Treats?
You can make Rice Krispie treats about 2-3 days before a party and store them in an airtight container at room temperature. For the best texture, keep them away from heat and humidity and decorate them according to the recipe.
How Far In Advance Can I Dip Rice Krispie Treats?
Chocolate-dipped Rice Krispie treats can generally be made 1-2 days ahead of serving. Let the coating fully set, then store them in an airtight container in a cool, dry place with parchment between layers.
Tips For Making and Decorating Halloween Rice Krispie Treats
- Don’t Overheat The Marshmallows: Melt the butter and marshmallows over low heat or use short microwave intervals. Overheating can make the finished treats hard and chewy instead of soft and crispy!
- Work Quickly: Once the cereal is mixed in, press and shape the mixture while it’s still warm and pliable. It becomes much harder to mold as it cools
- Grease Your Hands And Tools: A light coating of butter or nonstick spray keeps the sticky mixture from clinging to your work surfaces, hands, spatula, molds, and cookie cutters
- Don’t Press Too Firmly: Gently press the mixture into the pan or mold rather than compacting it tightly. Over-packing can make Rice Krispie treats dense and hard
- Let Them Set Before Decorating: Allow shaped treats to cool and firm up before adding chocolate, icing, or other decorations so everything stays in place
- Use Gel Food Coloring: Gel coloring provides vibrant Halloween shades without adding much extra liquid to the mixture or melted chocolate
- Melt Chocolate Carefully: Use short microwave intervals and stir frequently when melting chocolate or candy melts. Overheating can cause chocolate to seize or become difficult to work with
- Don’t Overload The Decorations: A few well-placed details can make a bigger impact than covering every inch of the treat! Let the shape and colors do some of the work
- Keep Decorations Food-Safe: Make sure any decorations, toppers, or small candies you use are intended for food!
Storage and Serving Tips
Storing
- Store At Room Temperature: Keep Halloween Rice Krispie treats in an airtight container at room temperature for about 2-3 days for the best texture
- Use Parchment Between Layers: Place parchment or wax paper between layers of decorated treats to prevent them from sticking together or smearing
- Keep Them Cool And Dry: Store treats away from direct sunlight, heat, and humidity, especially if they’re decorated with chocolate or icing
- Avoid Refrigerating When Possible: The refrigerator can make Rice Krispie treats firm and chewy, so room temperature storage is generally preferable. If you have to refrigerate due to melting chocolate, let them sit at room temperature for 10-15 minutes before serving to restore texture
- Freeze Undecorated Treats: Plain or simply shaped treats can be wrapped tightly and frozen for up to 1-2 months. Thaw them at room temperature before decorating or serving
Serving
- Decorate Close To Serving Time: If you’re using chocolate, icing, or delicate decorations, adding them closer to serving can help keep the treats looking their best
- Make A Halloween Dessert Tray: Arrange different shapes and designs together for a fun assortment that’s perfect for parties!
- Package For Party Favors: Wrap individual treats in clear cellophane bags or treat bags for easy party favors, classroom treats, or gifts
- Add Them To A Dessert Table: Display the treats alongside other Halloween sweets and snacks for an easy festive dessert spread
- Use As Cake Or Cupcake Toppers: Smaller decorated Rice Krispie treats can double as fun edible toppers for Halloween cakes and cupcakes
- Keep Small Decorations In Mind: If serving young children, be mindful of hard candies, small decorations, and other choking hazards!
More Halloween Party Recipes


- No Bake Halloween Treats
- Halloween Jello Shots
Final Thoughts
Halloween Rice Krispie treats are such a great dessert option for Halloween and classroom parties, trick or treating, movie night, and more! They’re kid friendly, adult approved, and super easy to make!
I love that they’re no bake, so no need to fire up the oven to deliver on delicious. Plus, Rice Krispies are easy to make ahead as well, taking the last-minute stress off when you’re trying to throw a spooktacular bash.
You can shape, color, and decorate your treats into all sorts of fun, cute, and spooky options that perfectly fit the season, for the ultimate Halloween dessert table!